
I shall share my relatively quick startup procedure for the PMDG B739 (in a cold and dark state). If you're going to follow this tutorial, follow each step accordingly.
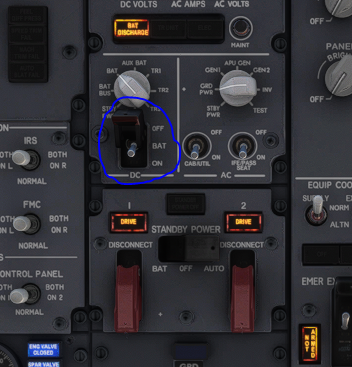
Find the main Battery (BAT) switch on the overhead panel. Flip it ON and then close the switch guard. You should hear the aircraft stir slightly.
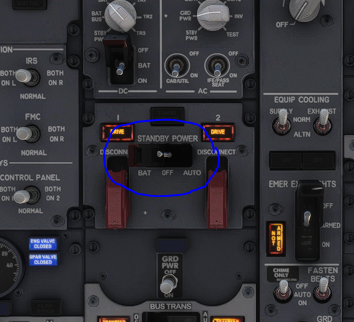
Right next to the Battery switch, locate the STANDBY POWER switch. Lift the switch guard and switch it to BAT. This ensures essential instruments have power if needed.
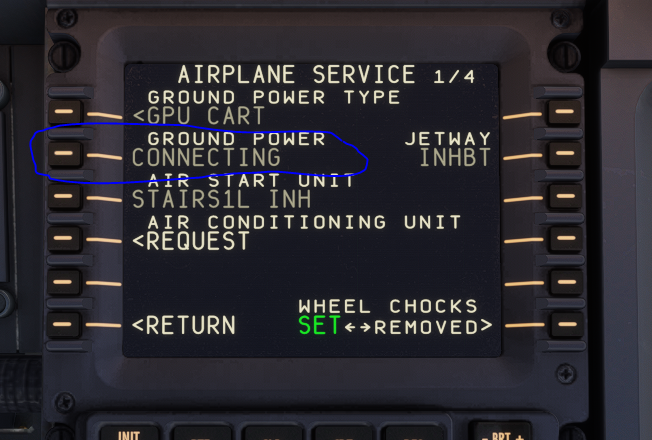
Let's get external power hooked up. Access the FMC (Flight Management Computer). Navigate through the menus (usually MENU > FS ACTIONS > GROUND SERVICES) and request Ground Power (GPU).
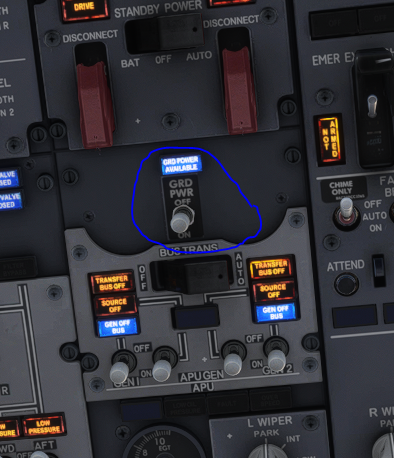
Head back to the overhead panel. Keep an eye out for the GRD POWER AVAILABLE light to illuminate – this confirms the ground crew has connected the power. Once it's lit, switch the Ground Power ON. The cockpit should come alive with more lights and sounds.
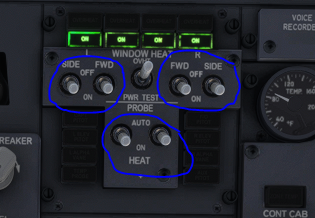
While you're on the overhead, switch Window Heat to ON to prevent fogging or icing later.
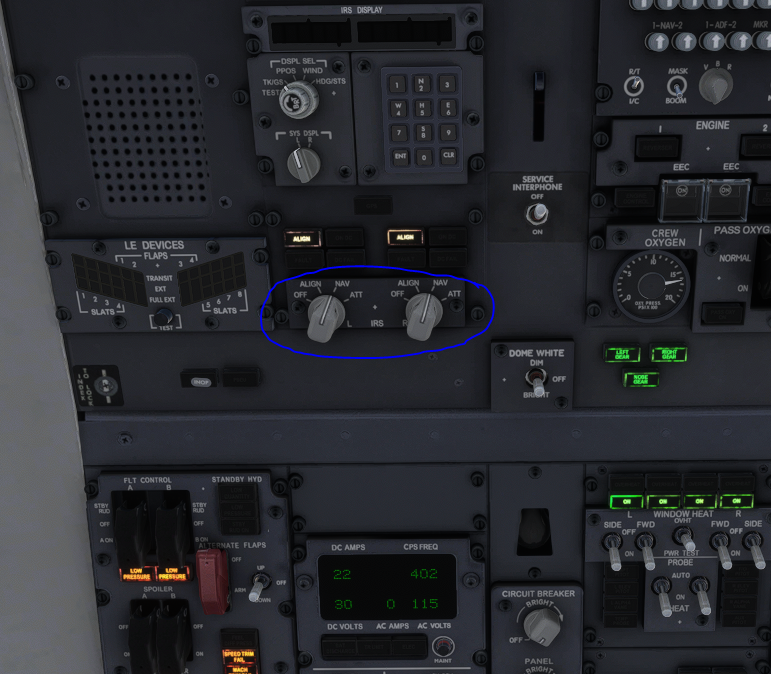
Look further back on the overhead panel to the Aft Overhead Panel. Find the two IRS (Inertial Reference System) selectors. Rotate both knobs from OFF to the NAV position. They need time to align, so we'll start them now.
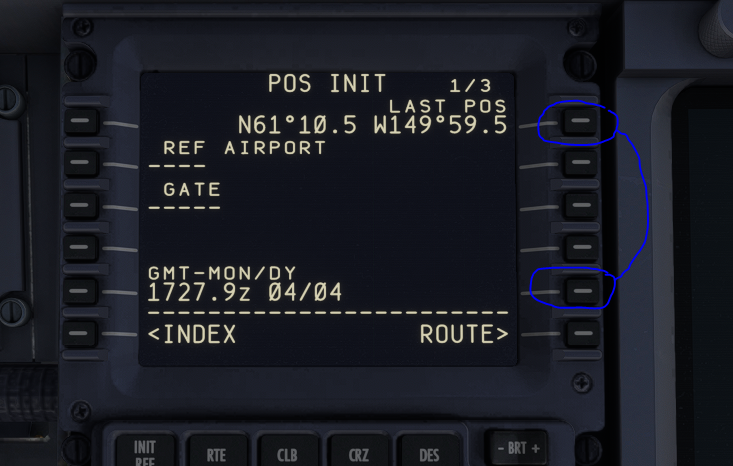
Go back to the FMC. Access the POS INIT page. You'll likely see the aircraft's last known GPS coordinates under "LAST POS". Copy these coordinates into the "SET IRS POS" scratchpad line. This gives the IRS its starting point for alignment.
If you have a flight plan ready, now is the perfect time to enter it into the FMC. (Detailed FMC programming is a separate topic!). Once your route is in, continue below.
Locate the EFIS (Electronic Flight Instrument System) control panel (usually below the glare shield). Rotate the BARO knob to set the current local altimeter setting (QNH or HPa). (Quick Tip: In many sims, pressing the 'B' key automatically sets this if you're feeling lazy!)
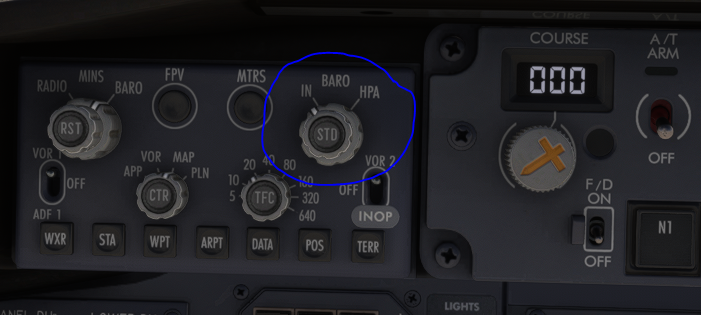
On the same EFIS panel, switch both Flight Directors (F/D) ON. You'll see command bars appear on your Primary Flight Display (PFD).

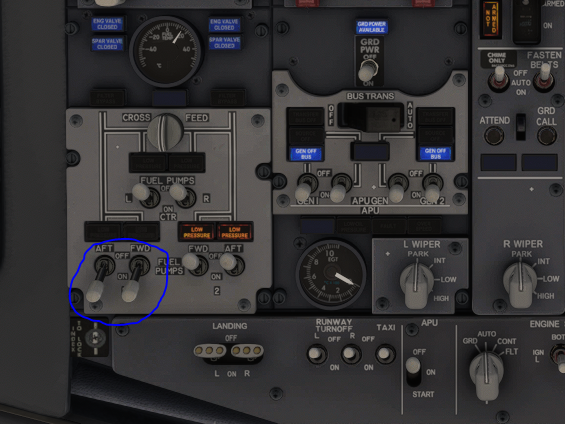
Head back to the overhead panel and switch Fuel Pump 1 (AFT+FWD) to ON.
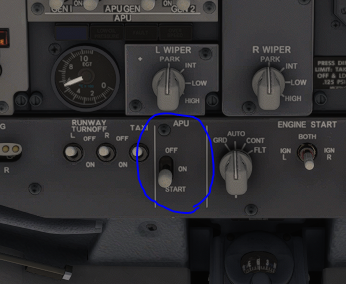
Find the APU switch. Move and hold it in the START position for a second or two. It will spring back to the ON position. Listen for the APU spooling up (it's in the tail). Wait for it to become fully available.
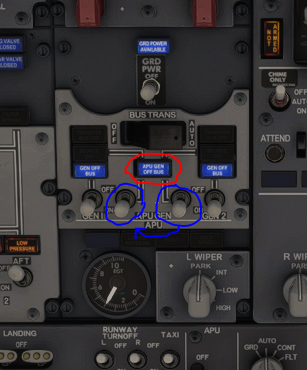
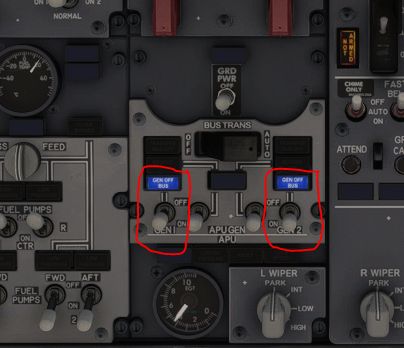
Watch for the blue APU GEN OFF BUS light to illuminate on the overhead panel. This signals the APU generator is ready. Now, switch the two APU GEN switches ON (standard practice is often right then left, as the screenshot likely showed). The blue light will extinguish as the APU takes the electrical load.
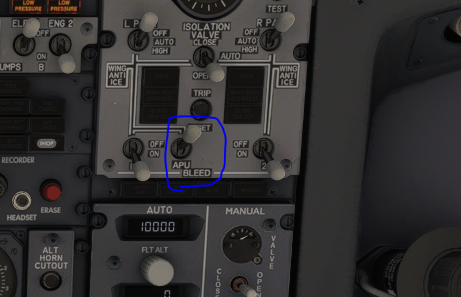
Switch the APU BLEED air switch ON. This provides air for engine starting and air conditioning.
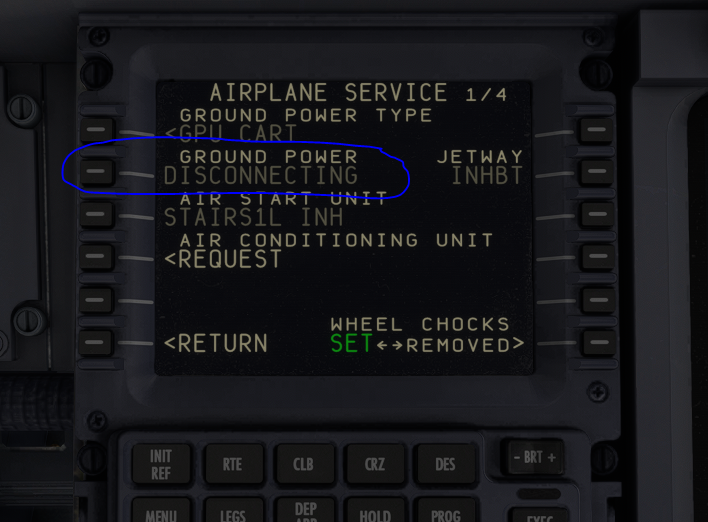
Now that the aircraft is self-sufficient with the APU, go back to the FMC Ground Services page and Release the Ground Power Unit. Confirm it disconnects.
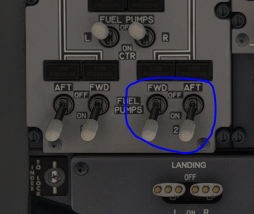
On the overhead panel, switch the remaining Fuel Pumps ON (AFT Pump 2, FWD Pump 2).
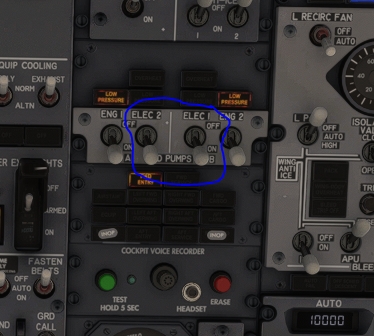
Switch the ELEC 2 and ELEC 1 Hydraulic Pumps ON.
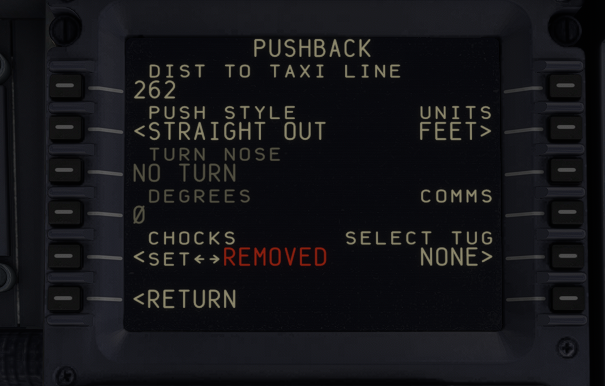
Let's get ready to move. In the FMC, go to MENU > FS ACTIONS > PUSHBACK. Press the button next to CHOCKS to change it from SET to REMOVED.
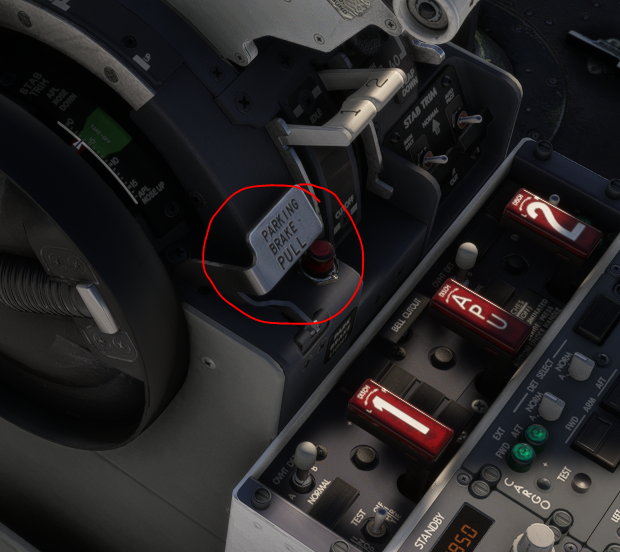
(Self-Briefing Break: Before you release the brakes or call the tug, quickly review the engine start steps below. Once you're comfortable, release the Parking Brake, select your tug direction, and request pushback. You'll typically start the engines during or just after the pushback, once cleared by ATC if applicable.)
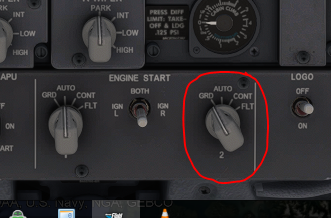
On the overhead panel, rotate the Engine Start Selector for Engine 2 to the GRD (Ground) position.
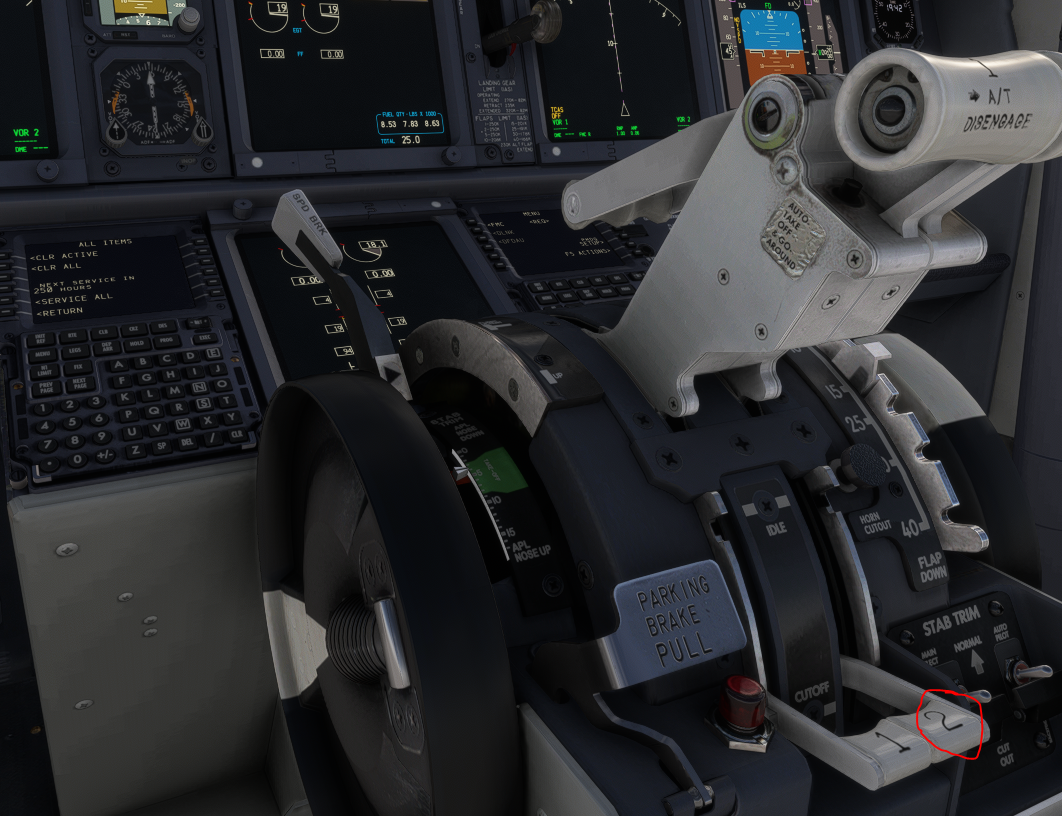
Immediately move down to the throttle quadrant. Locate the Fuel Control Switch / Start Lever for Engine 2. Move it smoothly up to the IDLE detent.
Once Engine 2 is stable (N2 around 56-58%, EGT stabilized), repeat the process for Engine 1: Rotate Engine Start Selector 1 to GRD, then move Start Lever 1 to IDLE. Monitor its startup.
With engines running, they can power the aircraft. On the overhead panel, switch Engine Generator 2 (GEN 2) ON, followed by Engine Generator 1 (GEN 1) ON.
The APU is no longer needed. Move and hold the APU switch to OFF.
Switch the APU BLEED air switch OFF.
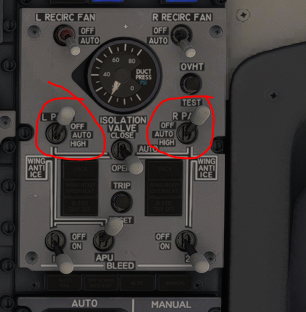
Switch the Left and Right PACKS (Air Conditioning) switches to AUTO.
Switch the YAW DAMPER ON.

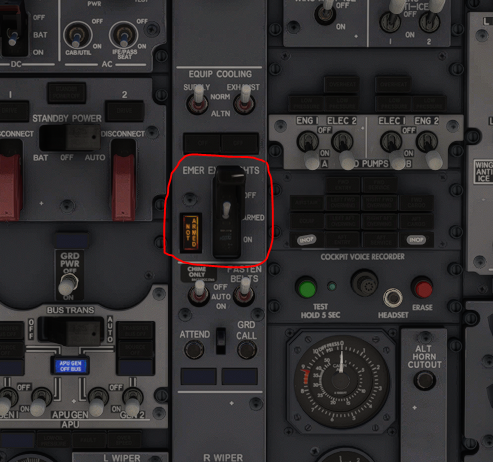
ARM the Emergency Exit Lights switch and close the switch guard.
Switch the TAXI light ON. Add Wing, Logo, or Position lights as needed based on conditions and procedures.

Engines stable, systems configured, and lights are on. You've successfully brought the PMDG 737-900 from cold and dark to ready-for-taxi. Complete your pushback if needed, get your taxi clearance, and enjoy the flight!